Enable or disable catch-all for usernames and domains
This post gives some more details on the new option to disable the catch-all functionality for additional usernames and custom domains, as well as the new custom alias format.
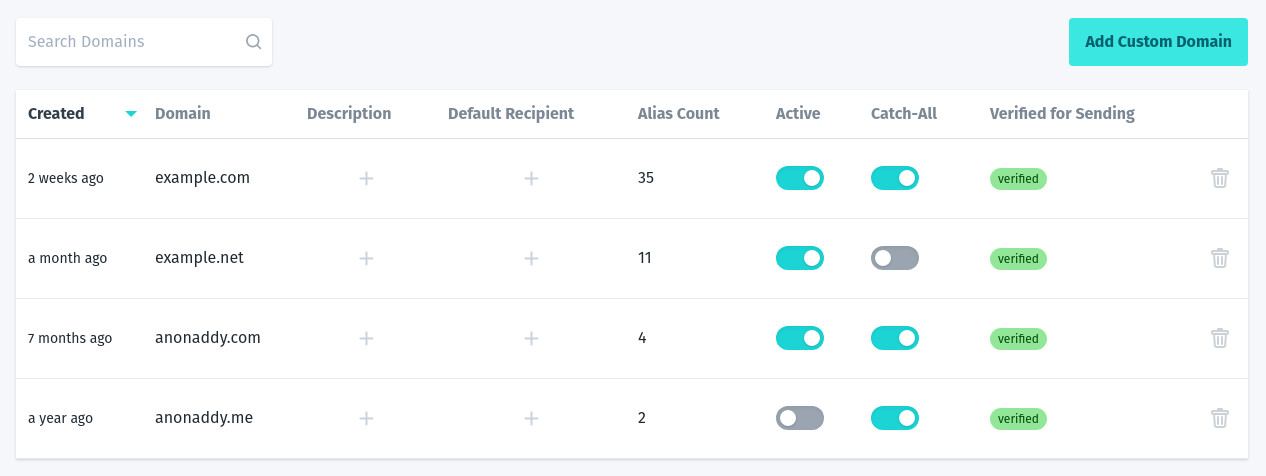
The new catch-all toggle switch
The option to be able to turn off automatic alias creation has been requested by a fair few users and I'm happy to say it's finally here!
If you head on over to your domains or usernames page you'll see the addition of a new column named "Catch-All". Each domain or username has a toggle switch to enable or disable the catch-all functionality.

If you disable catch all for a username or domain then you will only be able to receive emails for aliases that already exist in your account.
If someone tries to send an email to an alias that does not exist and you have disabled catch-all the email will be rejected.
I will shortly be adding the ability to disable or enable catch-all functionality to the main username of the account too.
If you are self-hosting please check the release notes on GitHub for updates that need to be made to a Postfix config file in order for the catch-all feature to work.
The new custom alias format
Since you now have the option to disable catch-all for your additional usernames and custom domains, I needed to add a way to create aliases whilst still being able to choose your own local part.
The new custom alias format is available for all domains except for shared ones (e.g. @anonaddy.me).
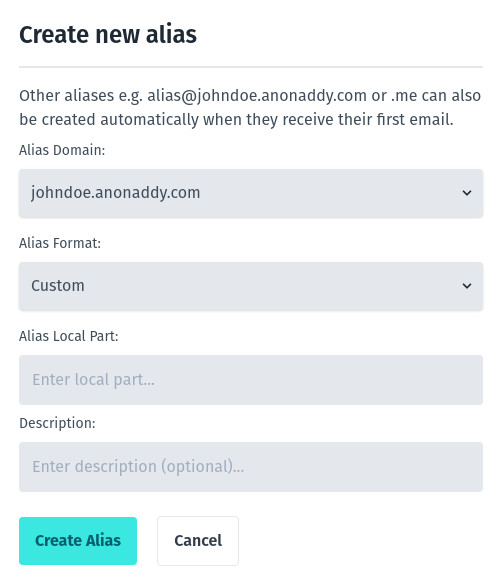
When creating an alias you are now able to select an alias format of custom. This will cause a new text input called "Alias Local Part" to be displayed. You can enter any valid local part for the email in this input.
For example, if I had the domain example.com and I wanted to create a new alias "hello@example.com" then I would select custom for the format and type "hello" in the local part text input.
The local part of an email address is anything before the @ symbol.

Browser extension updates
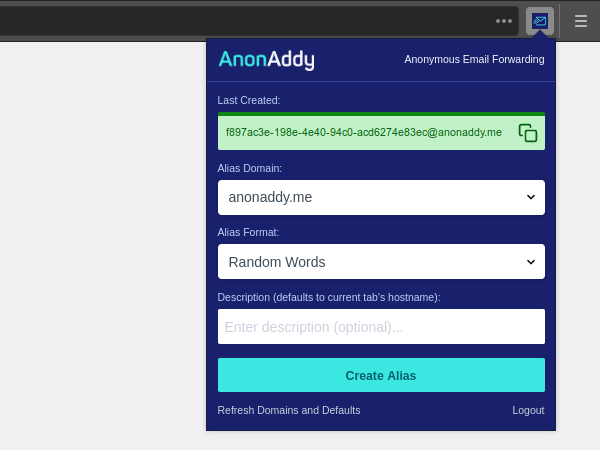
To reflect the above changes, the browser extensions have also been updated to allow you to enter your own custom local part when creating aliases.
A couple of other user requested additions have also been made. For those of you who are self-hosting, you can now change the API instance to point to your own addy.io location. To do so you will need to logout of the extension and then click "Change Instance" in the bottom right.
The extension will also now display the alias that was last generated so that you can easily copy it again.

Feedback and suggestions
If you have any feedback or suggestions please just get in touch and make sure to sign up to the newsletter if you'd like to receive updates on new features!