
Each alias forwards incoming mail to one or more recipients (your real email addresses). You can change which recipients an alias uses at any time-for example, to send an alias' mail to a different inbox or to add a second address. This article explains how to change the recipients for an alias on addy.io.
Changing the recipients of an email alias on addy.io
- Log in and go to Aliases in the navigation bar.
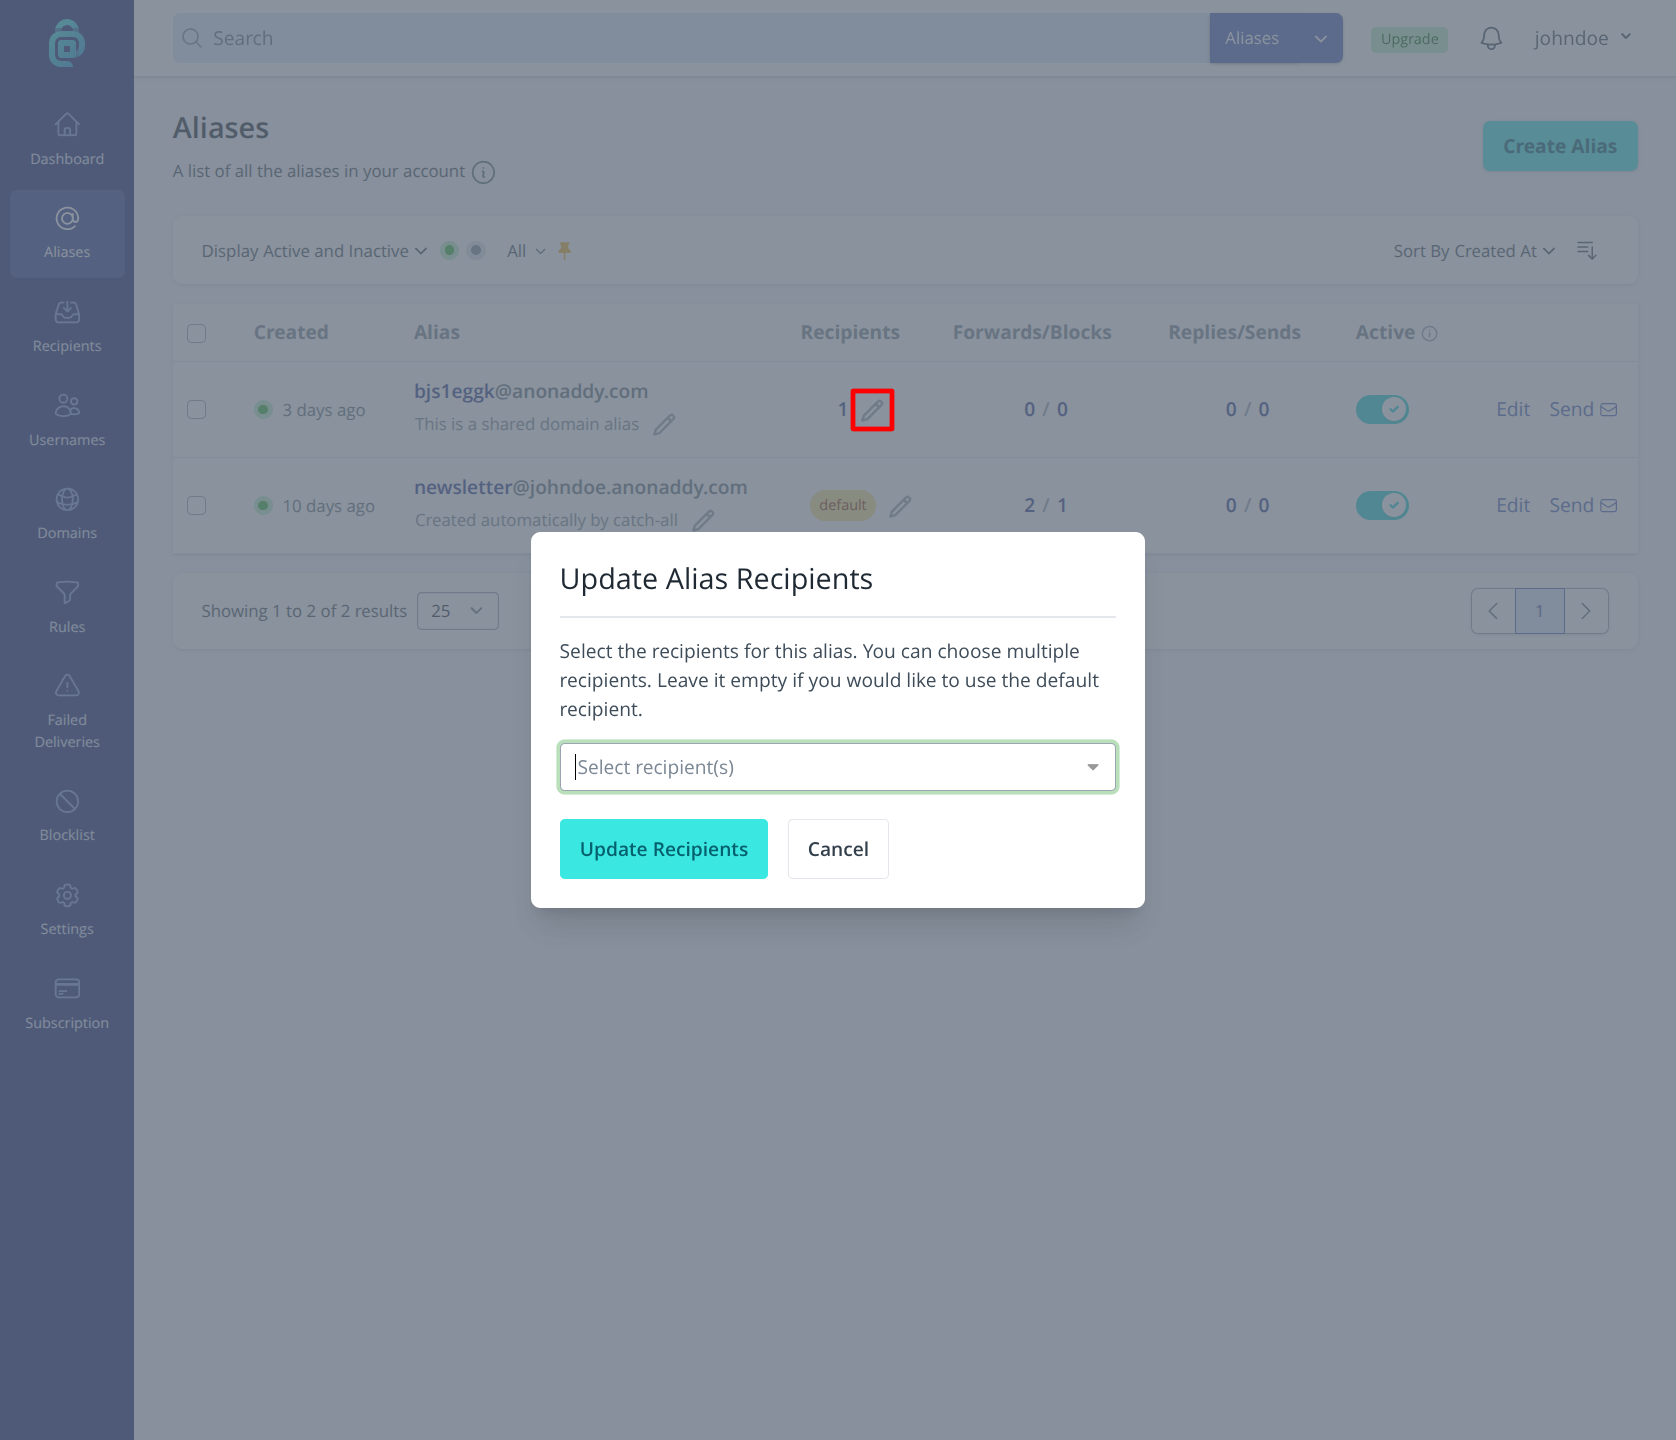
- Find the alias whose recipients you want to change and click the "pencil" edit icon (as shown in the red box below) to open the modal.
- Add or remove recipients: select from your verified recipients list, or remove one from the list in the modal.
- Click Update Recipients. From then on, mail to that alias will be forwarded to the recipient(s) you set.
You can also select multiple aliases (up to 25) and edit the recipients for them all in one go too.
If you are on a Duo or Family plan, the recipients list also shows the other people on your plan by username. Choose one to deliver the alias to their default recipient, without seeing their email address. Turn on Allow reply and send if they may reply and send from that alias. Leave it off and they can only receive mail. The same checkbox appears when you edit more than one alias, and it applies to every selected alias. At this time, you can do this only in the web app. See Delivering aliases to family members.
New aliases use your account’s default recipient until you change them. You can change recipients from the web app, and mobile app as well. Recipients must be added and verified before you can assign them to an alias.