
Rules let you automate what happens to incoming mail. You define conditions (e.g. sender address, subject, which alias received the email) and actions (e.g. block the email, disable encryption, forward to a specific recipient). When a message matches a rule's conditions, its actions are applied before the message is forwarded. This article explains how to create a new rule.
Where to create a rule
- Log in and go to Rules in the navigation bar.
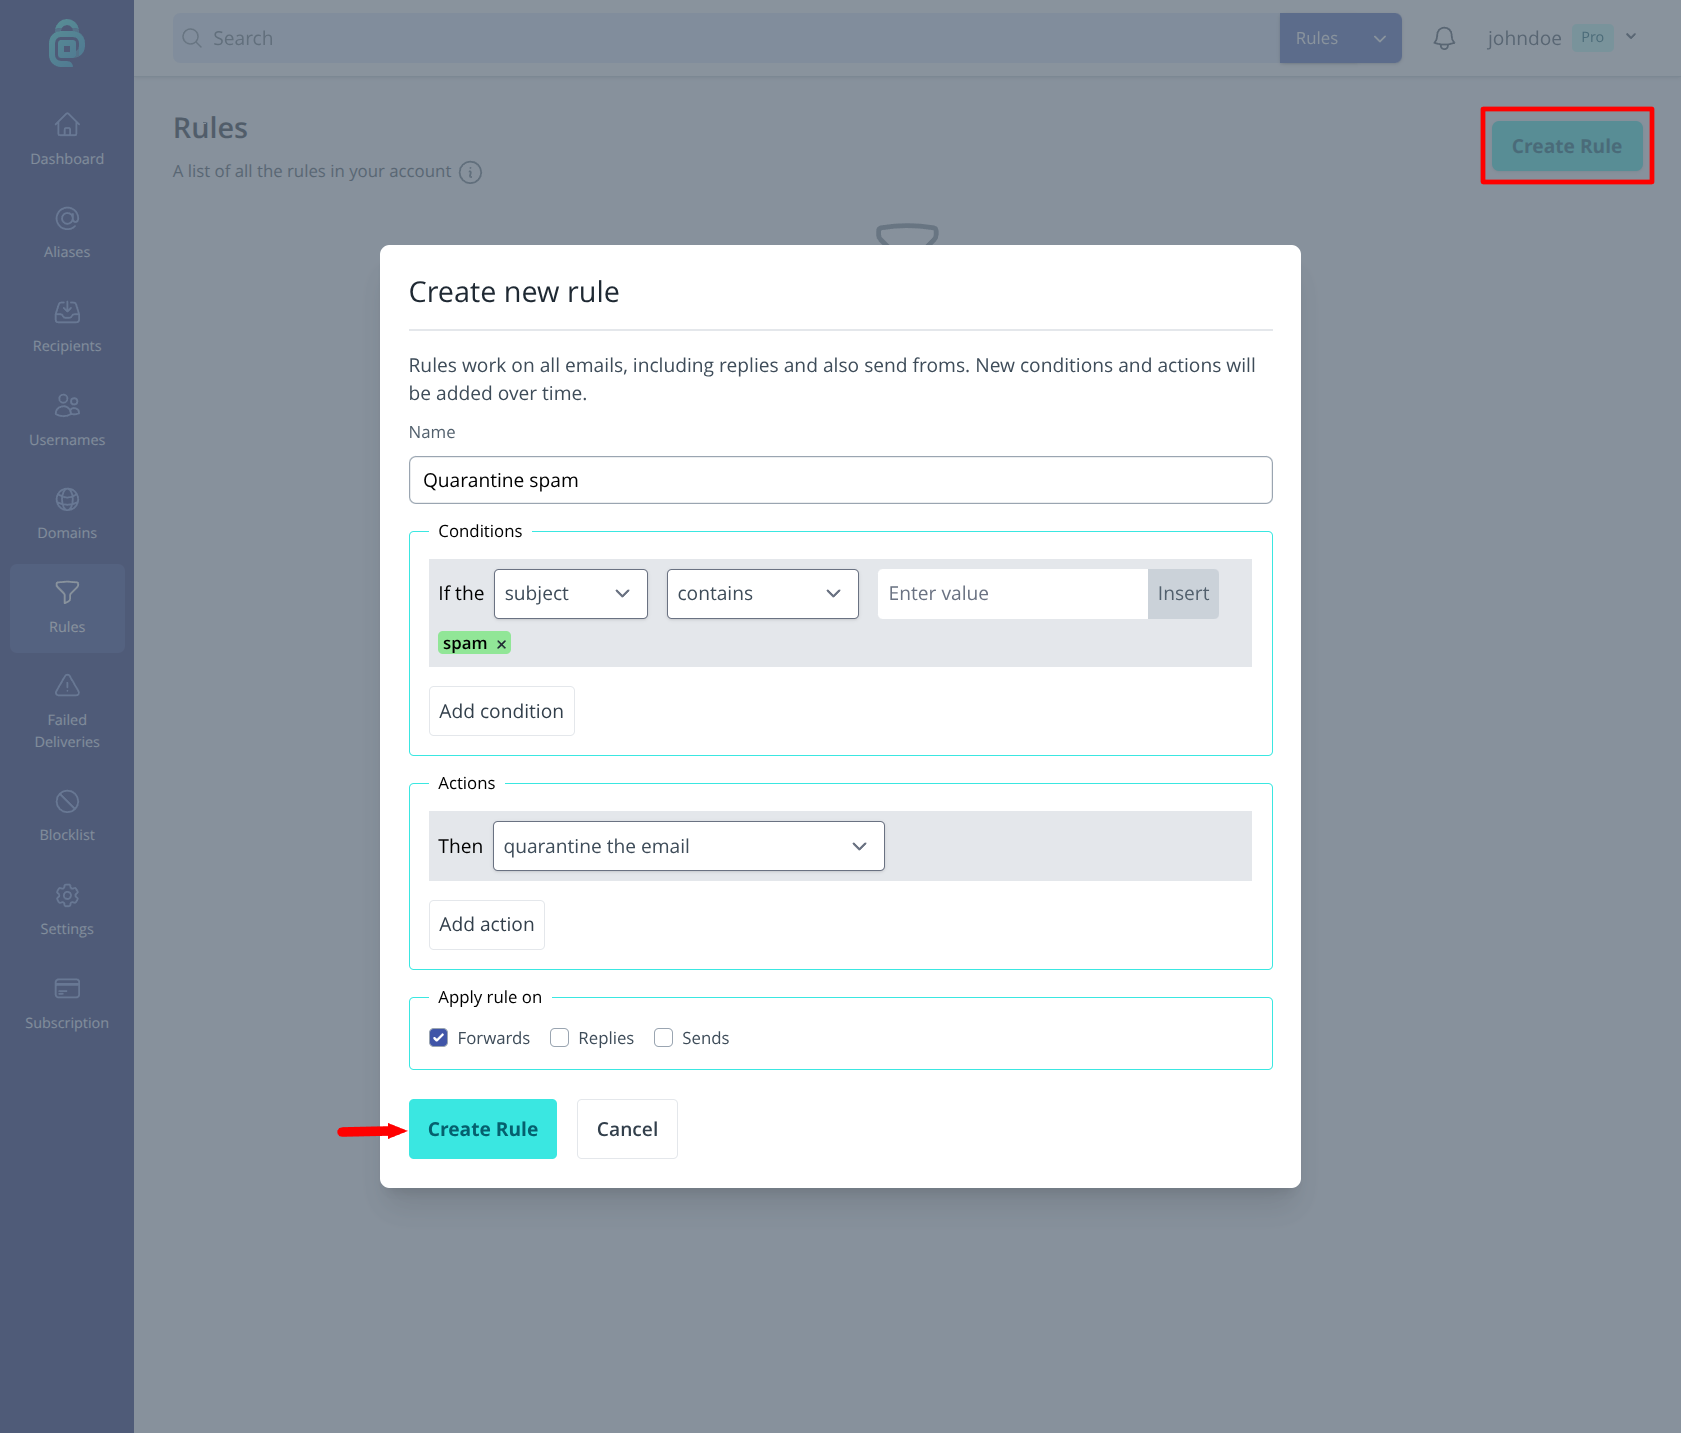
- Click Create rule as shown in the red box below.
- Give the rule a name (e.g. "Block newsletter senders") so you can recognise it later.
Setting conditions
Choose when the rule should run. Typical options include:
- Sender - Email address or domain of the sender (e.g. block mail from a specific address or
*@spammer.com). You can also use your blocklist for persistent blocks. - Subject - Words or patterns in the subject line.
- Alias - Which alias received the email (e.g. only apply this rule to mail sent to shop@yourdomain.com).
You can combine conditions (e.g. sender contains "newsletter" and/or alias is "news@johndoe.anonaddy.com"). Add the conditions that match your use case.
Setting actions
Choose what happens when an email matches the conditions. Common actions include:
- Block - Discard the email (sender is not notified).
- Disable encryption - Forward without encryption for this message.
- Forward to - Send to a specific recipient instead of the alias's default.
- Send a webhook to - POST a signed JSON payload to a public https URL when the email is accepted. See Sending a webhook.
Add one or more actions, then save the rule. The rule will be applied to incoming mail in the order you have set. You can deactivate or delete it later if needed.